The Body
Bonnet, boot, doors, roof and engine bay
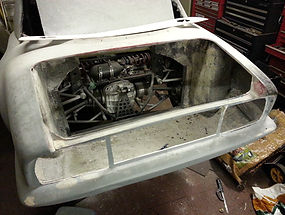
Engine bay
The body is still, just, the same one that left tthe factory in 1967. I fitted flaired arches and an air dam then, after the fire that almost destroyed the car, I grafted on a Vegantune front skin with built in flairs and an air dam. I also fitted the S4 rear panel so I could fit decent rear lamps. That was how it stayed until the radical rebuld started in 2004.
First task was to get the body cleaned of over 40 years of crud and oil.


John, with his favourite marigolds, pressure cleaning the underside.
Routing the exhaust was almost a game stopper. Being on the opposite side to the original and a lot bigger (3") there was nowhere for it to go that wouldn't melt my feet or cause ground clearance issues. Thinking outside the box resulted in cuting out the bulkhead and routing the exhaust behind the engine and out the passenger side.

Turbo in position showing that there was nowhere for the exhaust pipe to go.......
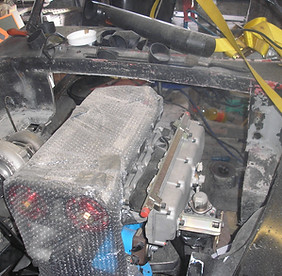
.......other than behind the engine, so that is what I did. cutting out the bulkhead was the easy part.

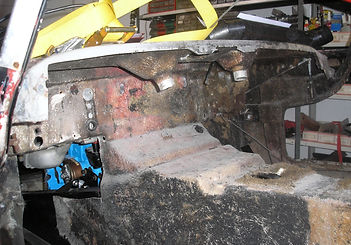
The vertical sill face to the right of the pipe will be removed so the silencer can be positioned inside the sill.


Exhaust shape was mocked up in 2" drain pipe.
The car was then taken to Primary Designs for the exhaust to be made. They also made an internal sill and a perforated cover for the silencer based on my CAD design.


Off to and arriving at Primary Designs.
Exhaust system showing pipe, repackable silencer and inner sill. Outer perforated cover not shown.

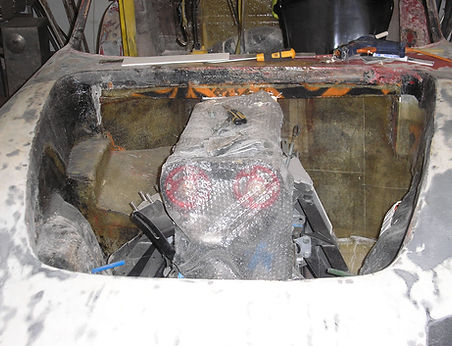
When I got the car home it was time to build the bulkhead. Using Corex it was relatively simple to play around until an acceptable shape was achieved. This was then covered in fibreglass to for the bulkhead. However, like a lot of jobs on this car, all this work was cut out at a later stage due to a radical rethink. See the page for the story.
Whilst at Primary Designs a group of race engineers from Red Bull visited (PD make exhausts for F1 teams). They had to ask Pat Barrett (owner) what my car was :-) I guess it was too old for the young engineers to recognise.
Exhaust sill and cover design.


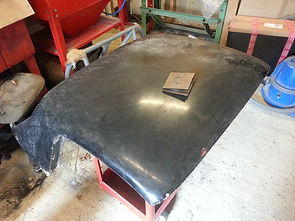
Bonnet
Next task was to make a carbon fibre bonnet that would clear the cam belt and turbo. I worked out where to cut the bonnet so it fitted and then went about making a mould from which the carbon bonnet could be produced.


Stripping 40 years of paint
The car had at least six layers of top coat paint on it (red, yellow, blue, blue, black and black) plus various sealing and primer coats so these had to be removed. Tried soda blasting but this didn't touch it. I was told that I couldn't use paint stripper as it would destroy the gelcoat but, in the end, I used a commercial stripper and this did the job but it still needed multiple applications! Afterwards I pressure washed it and there appeared to be no adverse affect to the fibreglass.

Good friend John returning a favour. Notice he still has his favourite marigolds, they don't leave his side :-)
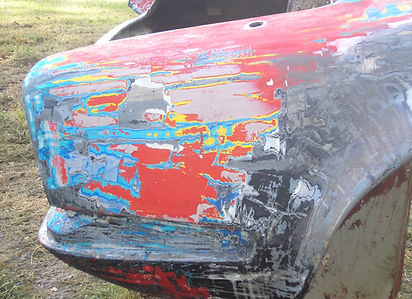
Once we started stripping the number of paint layers became obvious.

The Boot
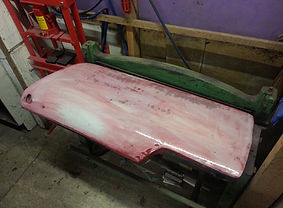
The boot lid had, by this time, been replaced with a carbon version, saving 4.78Kg.
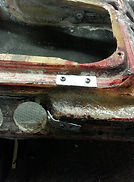
Some years ago I replaced the boot floor, which had a raised section to accommodate the exhaust box, with a flat one. As I was having to widen the wheel tubs in order to fit wider wheels, I thought I might as well replace this floor with a carbon fibre one (the wheel tubs were going to be carbon). This simple job removed over 2Kg.
Whilst in the boot area I replaced the rear light panel (600gm saving) and drilled holes wherever I could :-)
Rear lamp panel cut out ready for carbon fibre replacement.

Tub patterns made as well as carbon firewall.
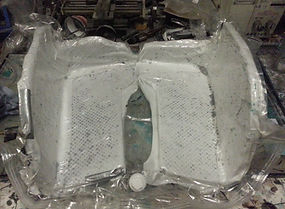
Tubs under vacuum

Removable access panel between tub under vacuum and rear lamp panel ready for trimming and fitting.

Old tubs and firewall removed

Tub patterns covered in fibreglass to form moulds.

New wheel tubs and firewall dry fitted.
New carbon fibre boot floor. Also notice lightening holes :-)

Tub moulds ready for carbon.

Doors
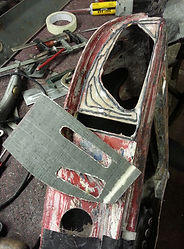
The plan was to have carbon fibre doors, using the fibreglass units as moulds. They were made and weighed just over a Kg each but they weren't to my satisfaction so I reverted to the originals. In order to reduce their weight by as much as possible I cut out most of both the inner and outer skins, just leaving a skeleton. Prior to cutting out the outer skin I used it as a mould to form a 2 layer carbon fibre skin. This was before I discovered vacuum bagging so they aren't as light as they could have been.
I also attacked the remaining fibreglass with drills and hole cutters, over 400 holes per door! This has reduced each door to just under 3kg. I might revisit full CF doors at a later date,
I recently discovered that the passenger door opening is 30mm wider than the driver's opening! Never noticed this as the door shut OK and is the same size the driver's door. I had thoughts of having to cut and move the rear section of the door well. However, as most of the door had been removed it was a relatively simple job to adjust the door to fit the existing opening. Further investigation has shown that the body is a mess, but it's what I have to work with .
One advantage of replacing the outer skin, apart from making the door fit, was to remove the traditional Lotus door bottom rear corner warp.

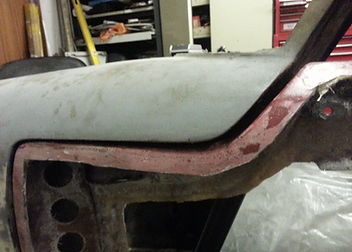

Trial fitting of door skeleton shows just how much out the opening is!


However, some judicious cutting and shutting got the door to fit pretty well and remove the bottom corner warp.
Door prepared for carbon with release agent


Carbon applied to door. Pre vacuum bagging days
New door skin attached to reshaped door. Note the panel gaps. When finished they willbe better than factory. Mind you, that won't be difficult :-)
As I am not using the original door/window frames I don't have lock brackets, so have made them from carbon sheet.
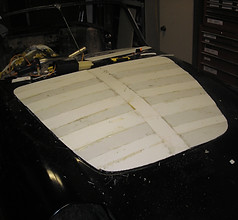
Roof